Getting started with Flippify

Explore the key features of Flippify and learn how to get the most out of the platform. This guide covers everything from navigating the dashboard to uploading your first sales and managing inventory efficiently.

Connect Account

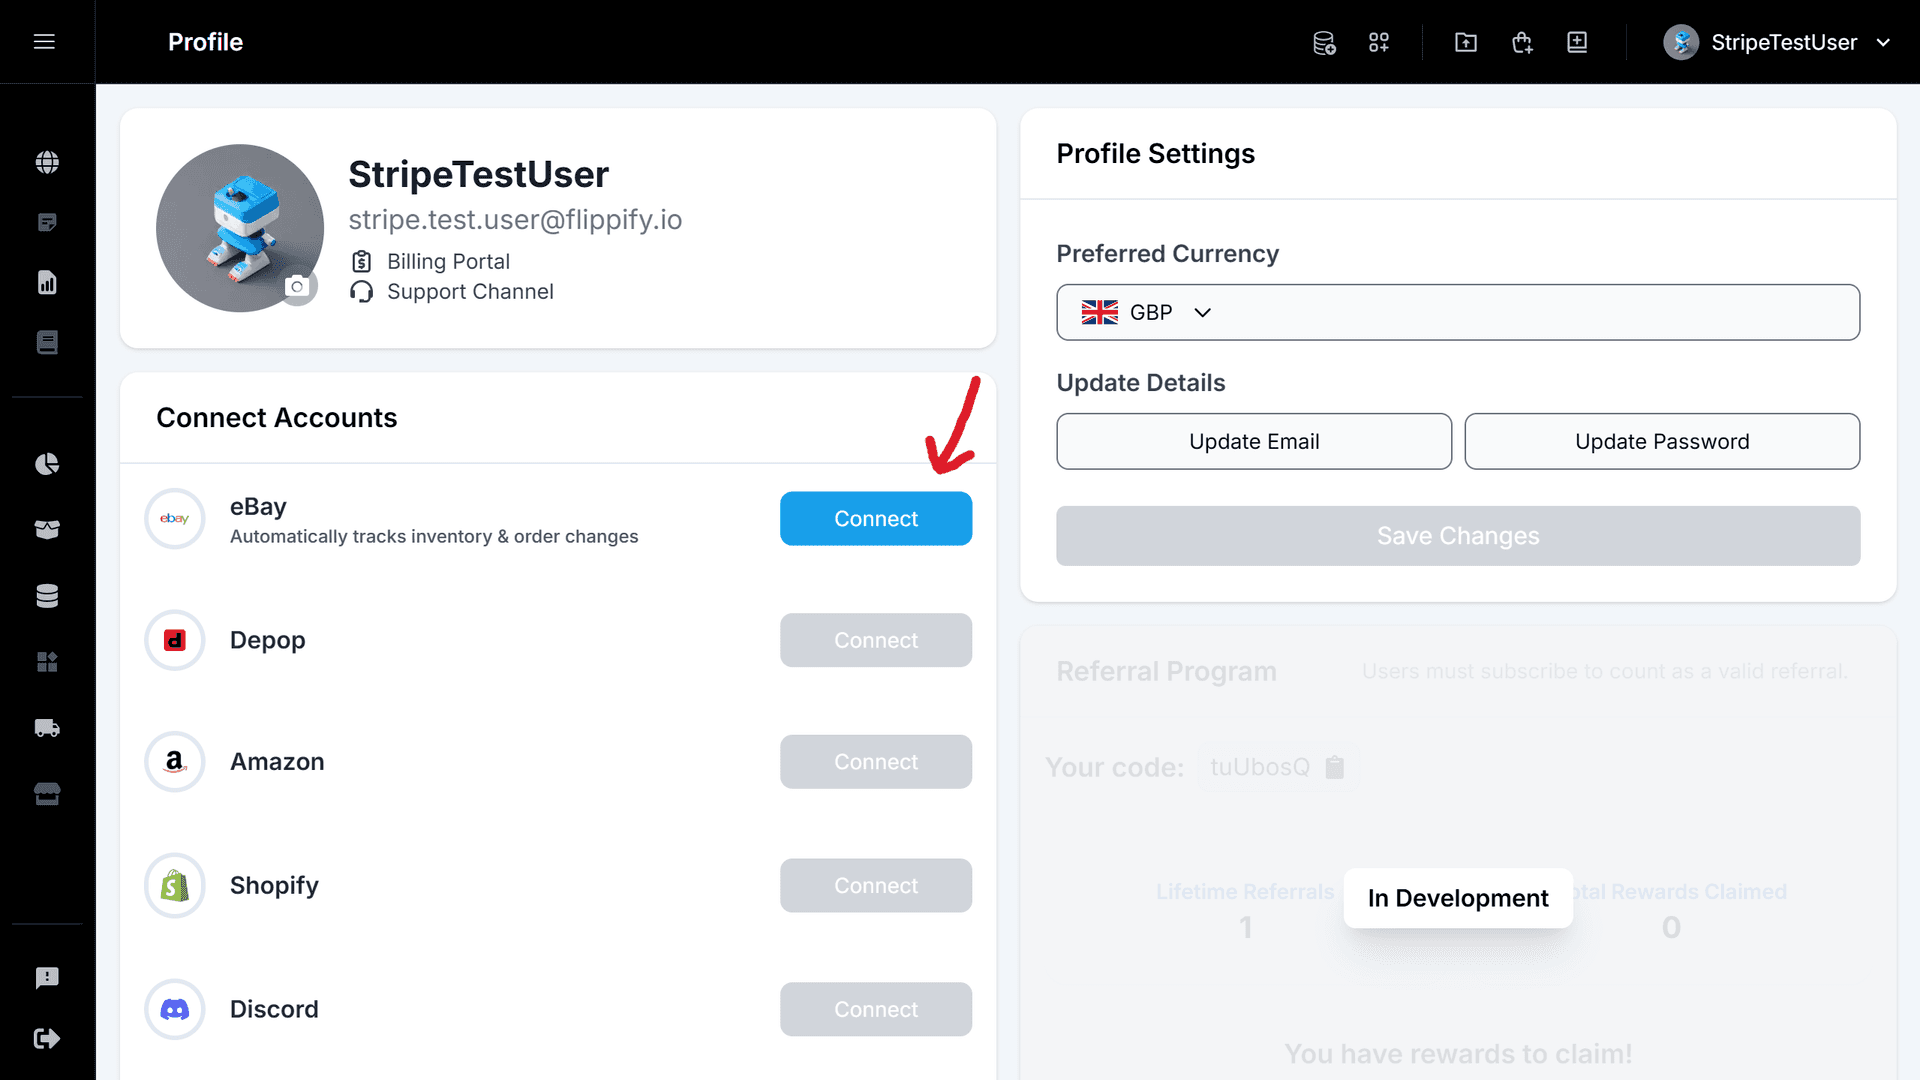
Step 1: Select Your Marketplace and Click “Connect”

Marketplace selection dropdown with “Connect” button highlighted

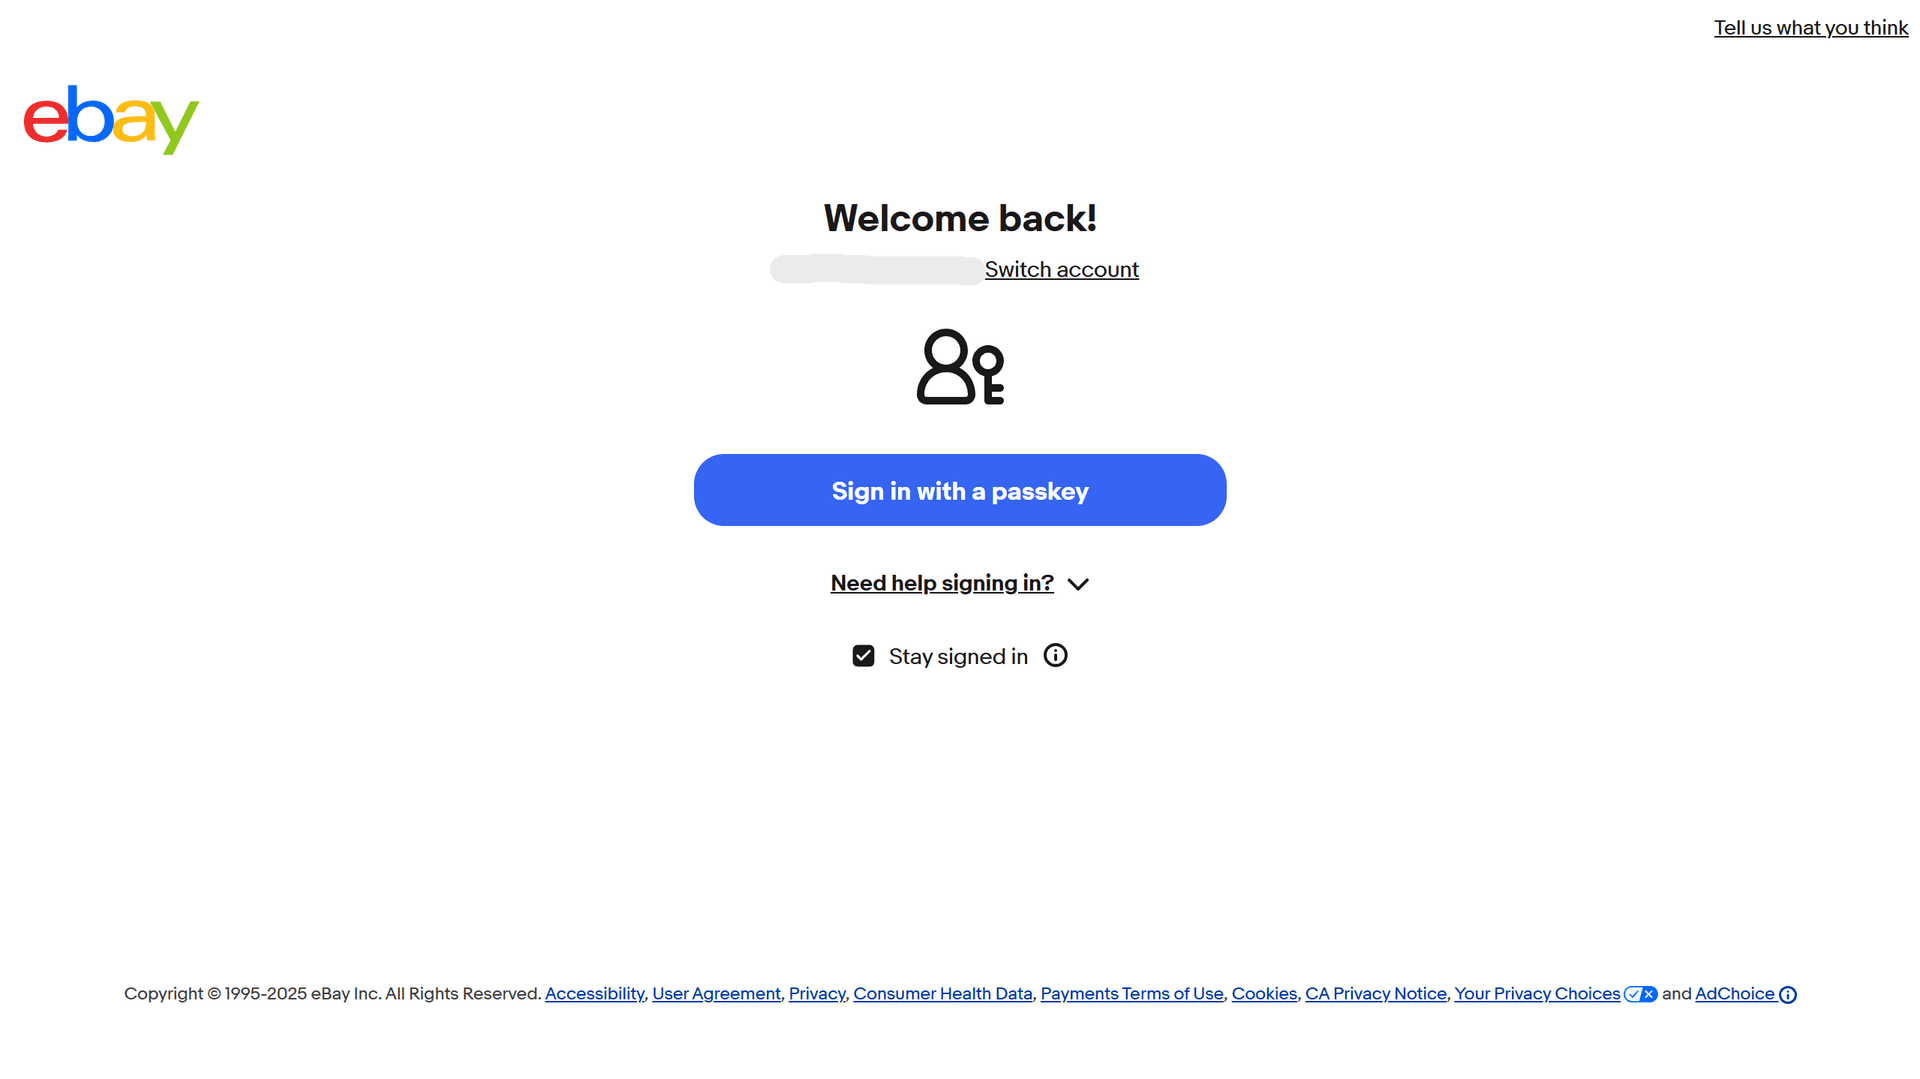
Step 2: Authenticate Your Account in the Popup

eBay login screen showing username and password fields

Step 3: Flippify Begins Syncing Your Listings

Dashboard view showing synced inventory items from eBay
Edit Inventory & Orders

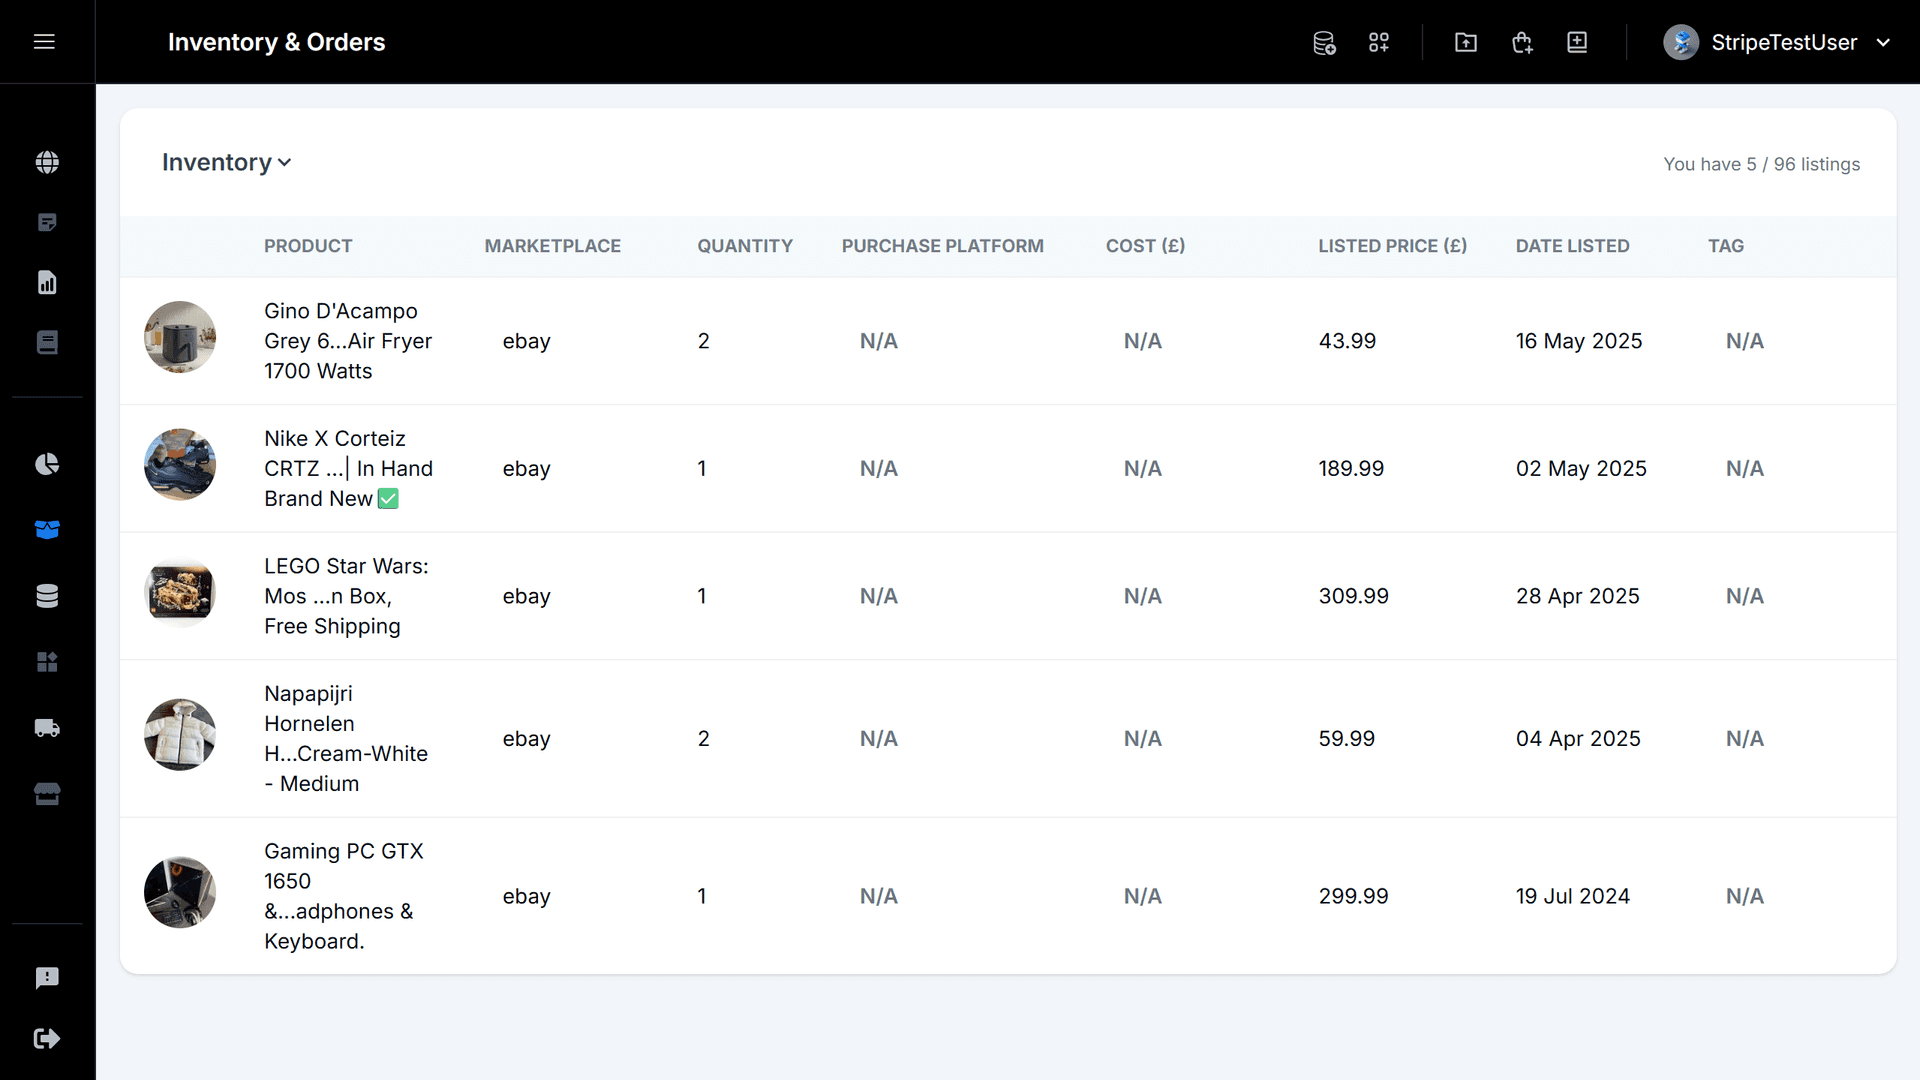
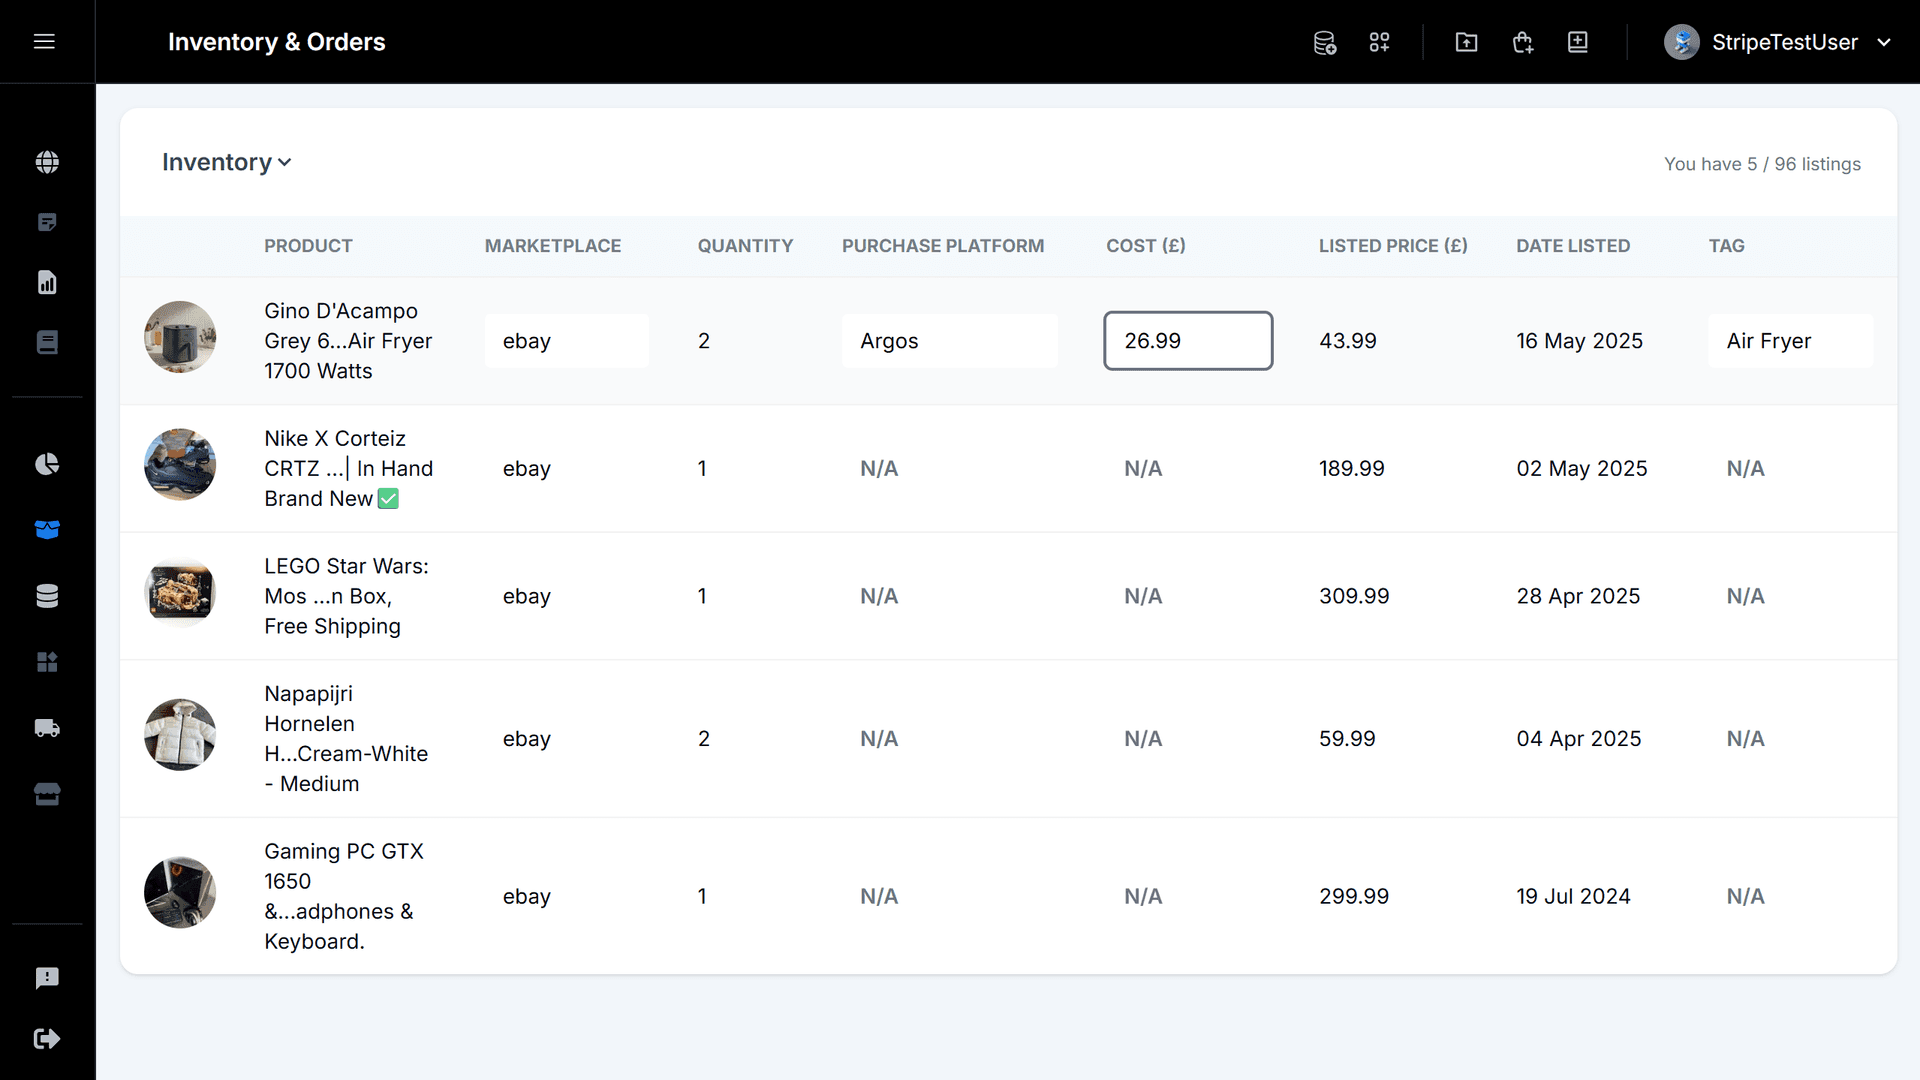
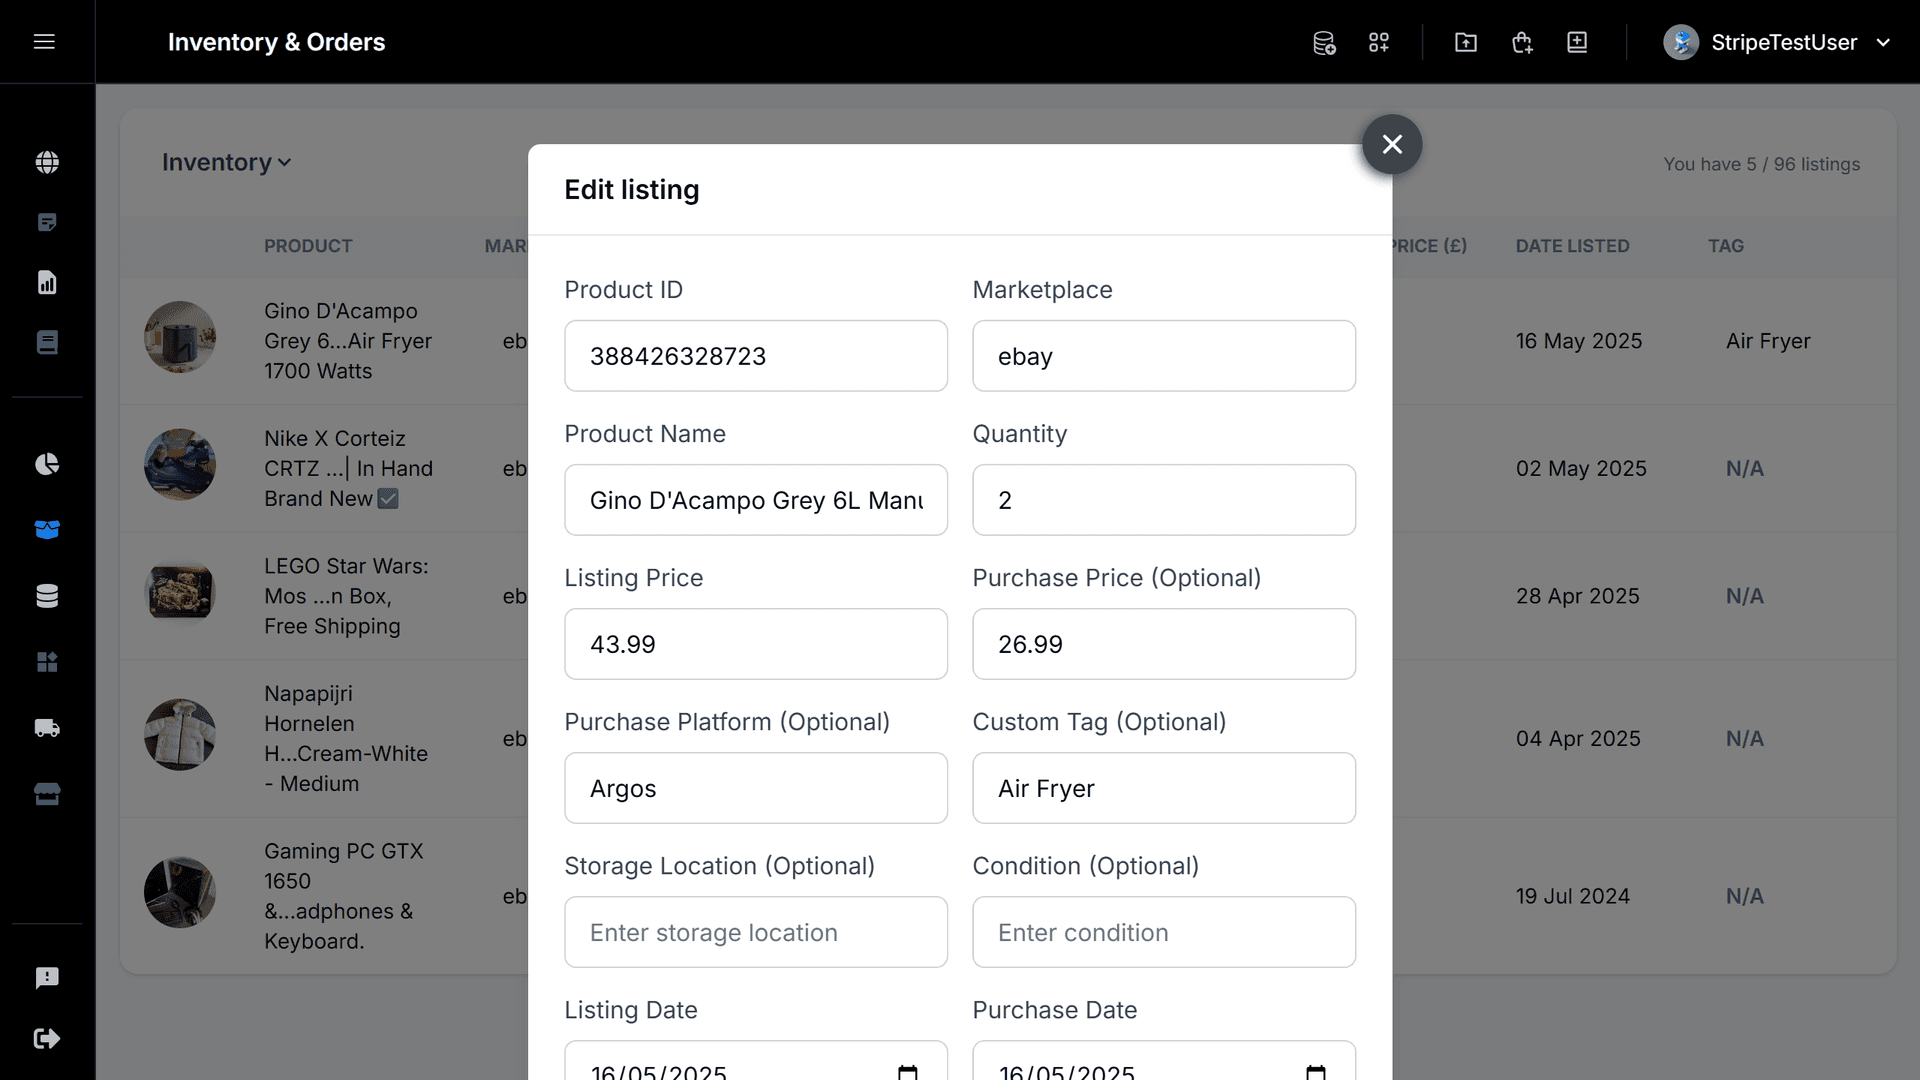
Step 1: Inline-Edit Inventory and Order Fields

Editable table with inventory and order columns

Step 2: Right-Click an Item and Choose “Edit”

Context menu over a table row with “Edit Item” option

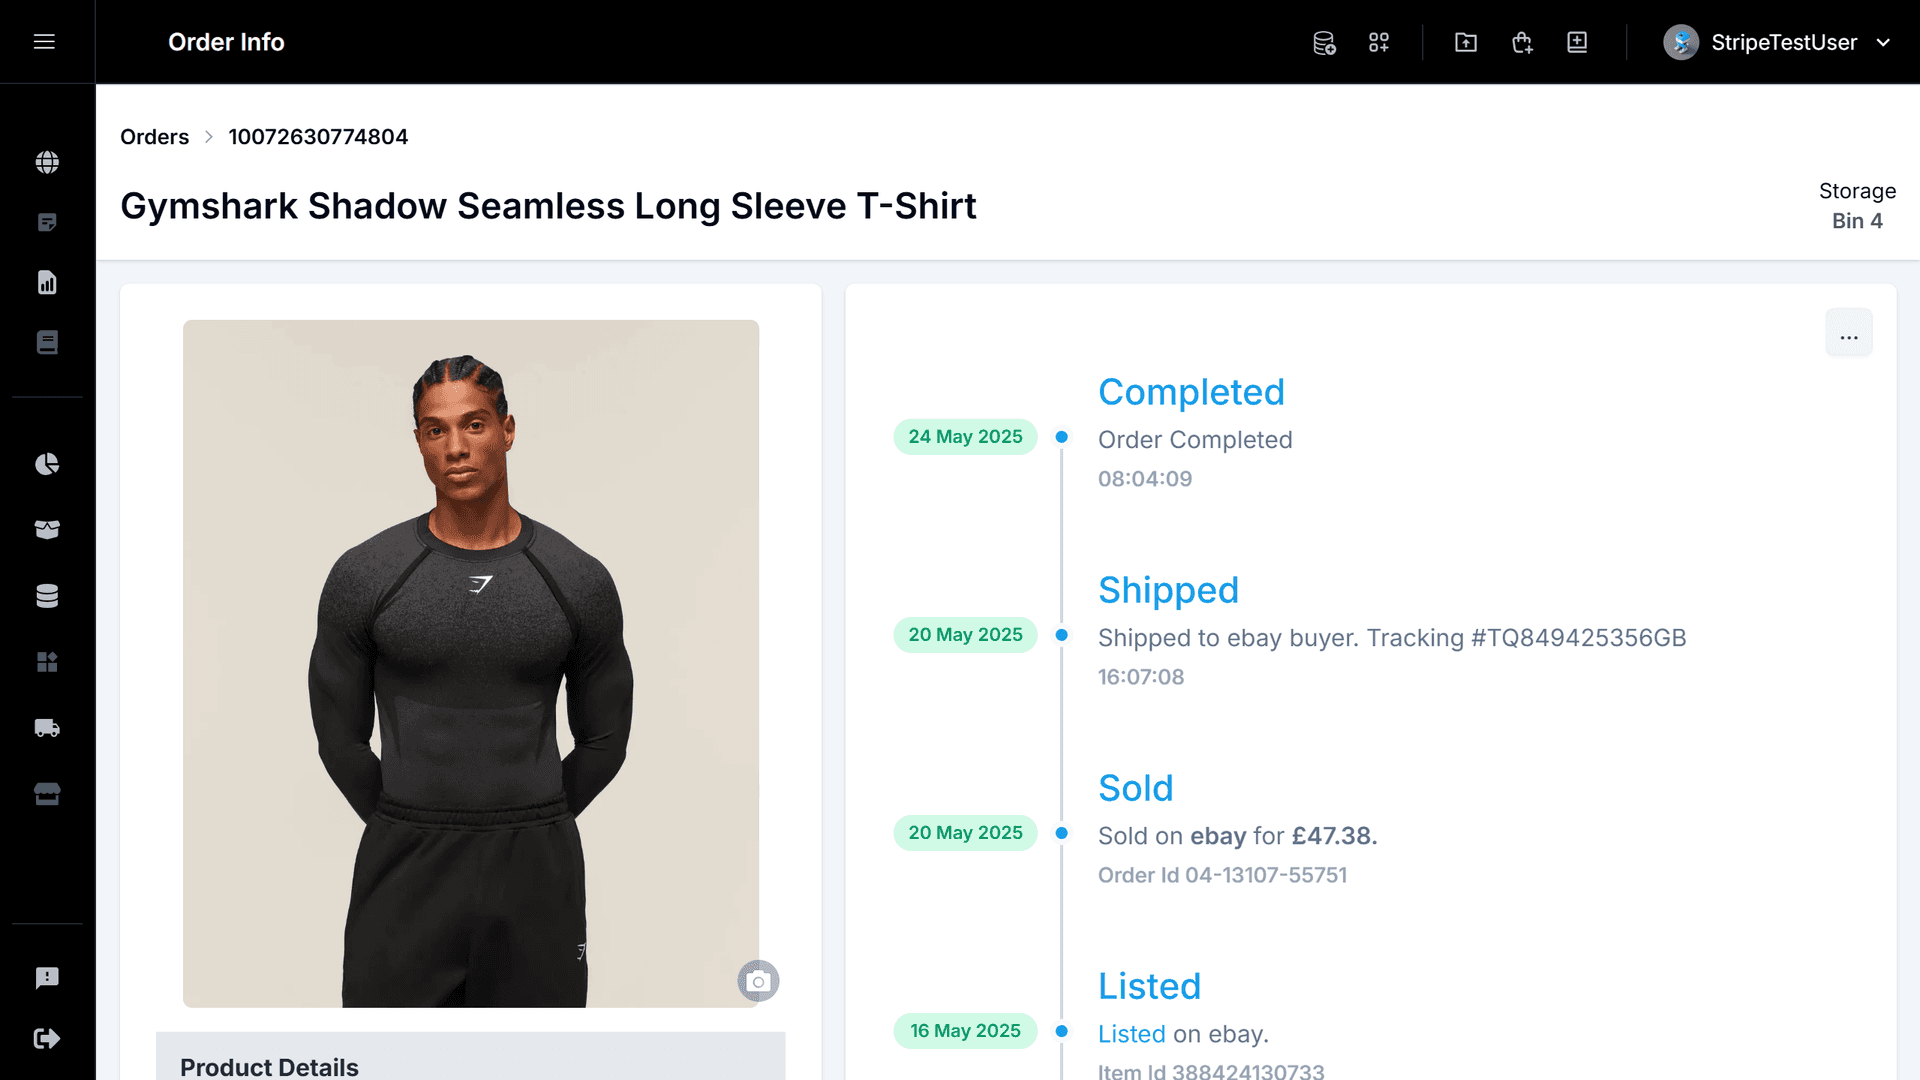
Step 3: View Full Order Details and Payout Estimates

Order details panel showing history, status, and estimated payout
Shipping & Fulfillment

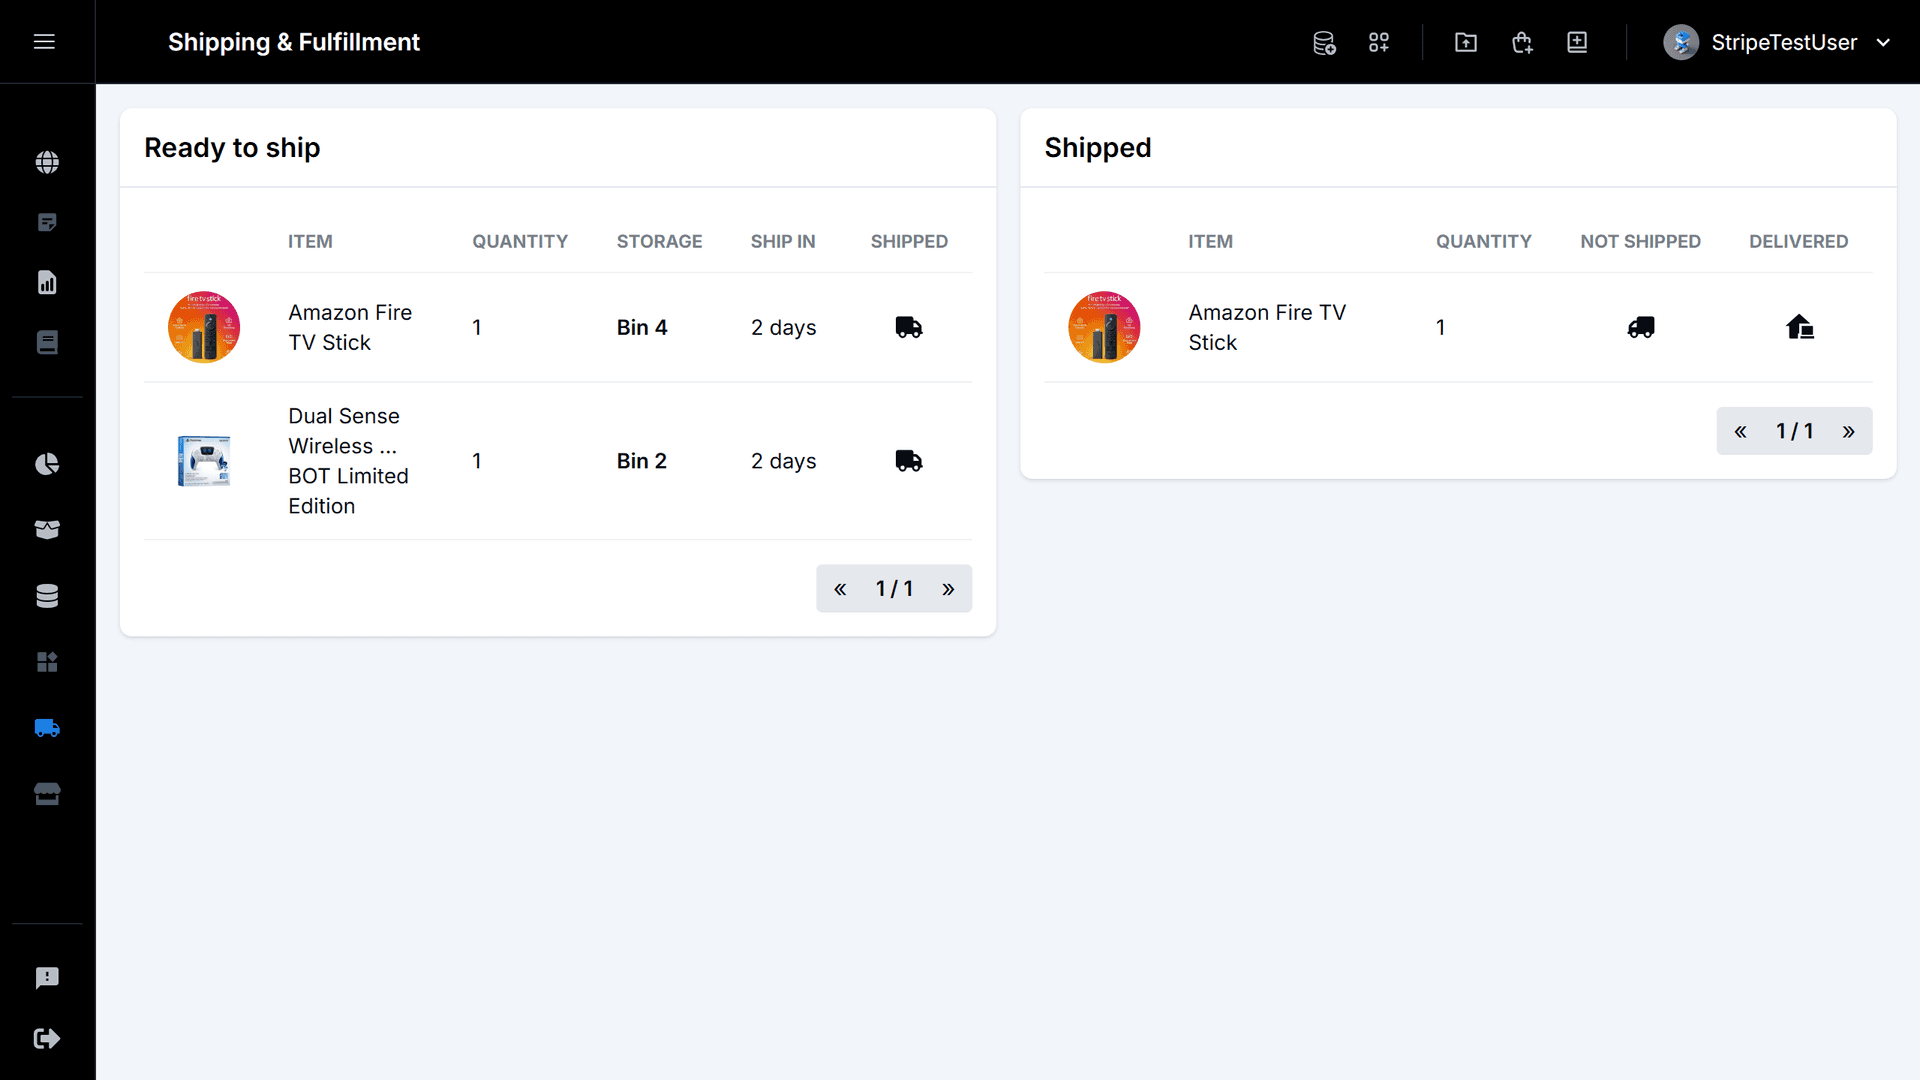
Step 1: Navigate to Shipping & Fulfillment

Shipping & Fulfillment dashboard listing pending shipments

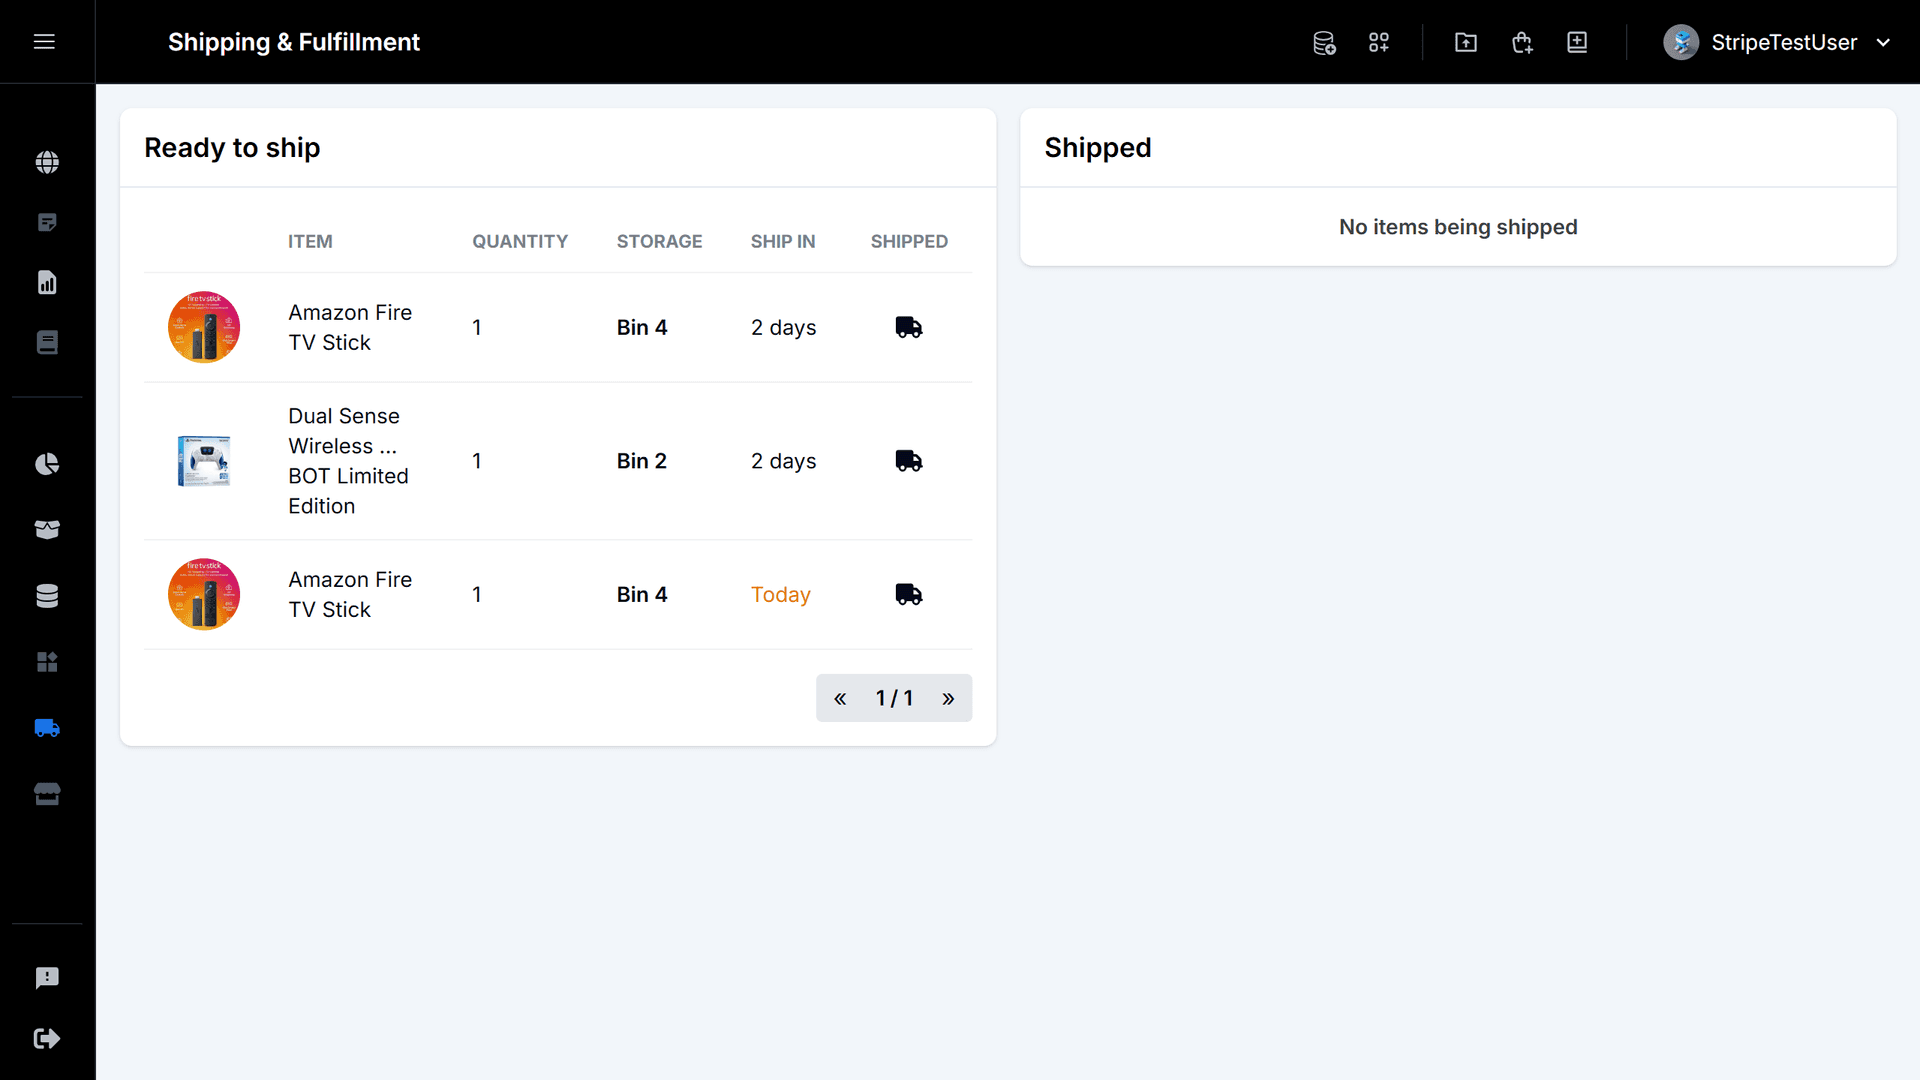
Step 2: Select Items to Mark as Shipped

List of orders that are ready to shipped and have been shipped
One Time Expenses

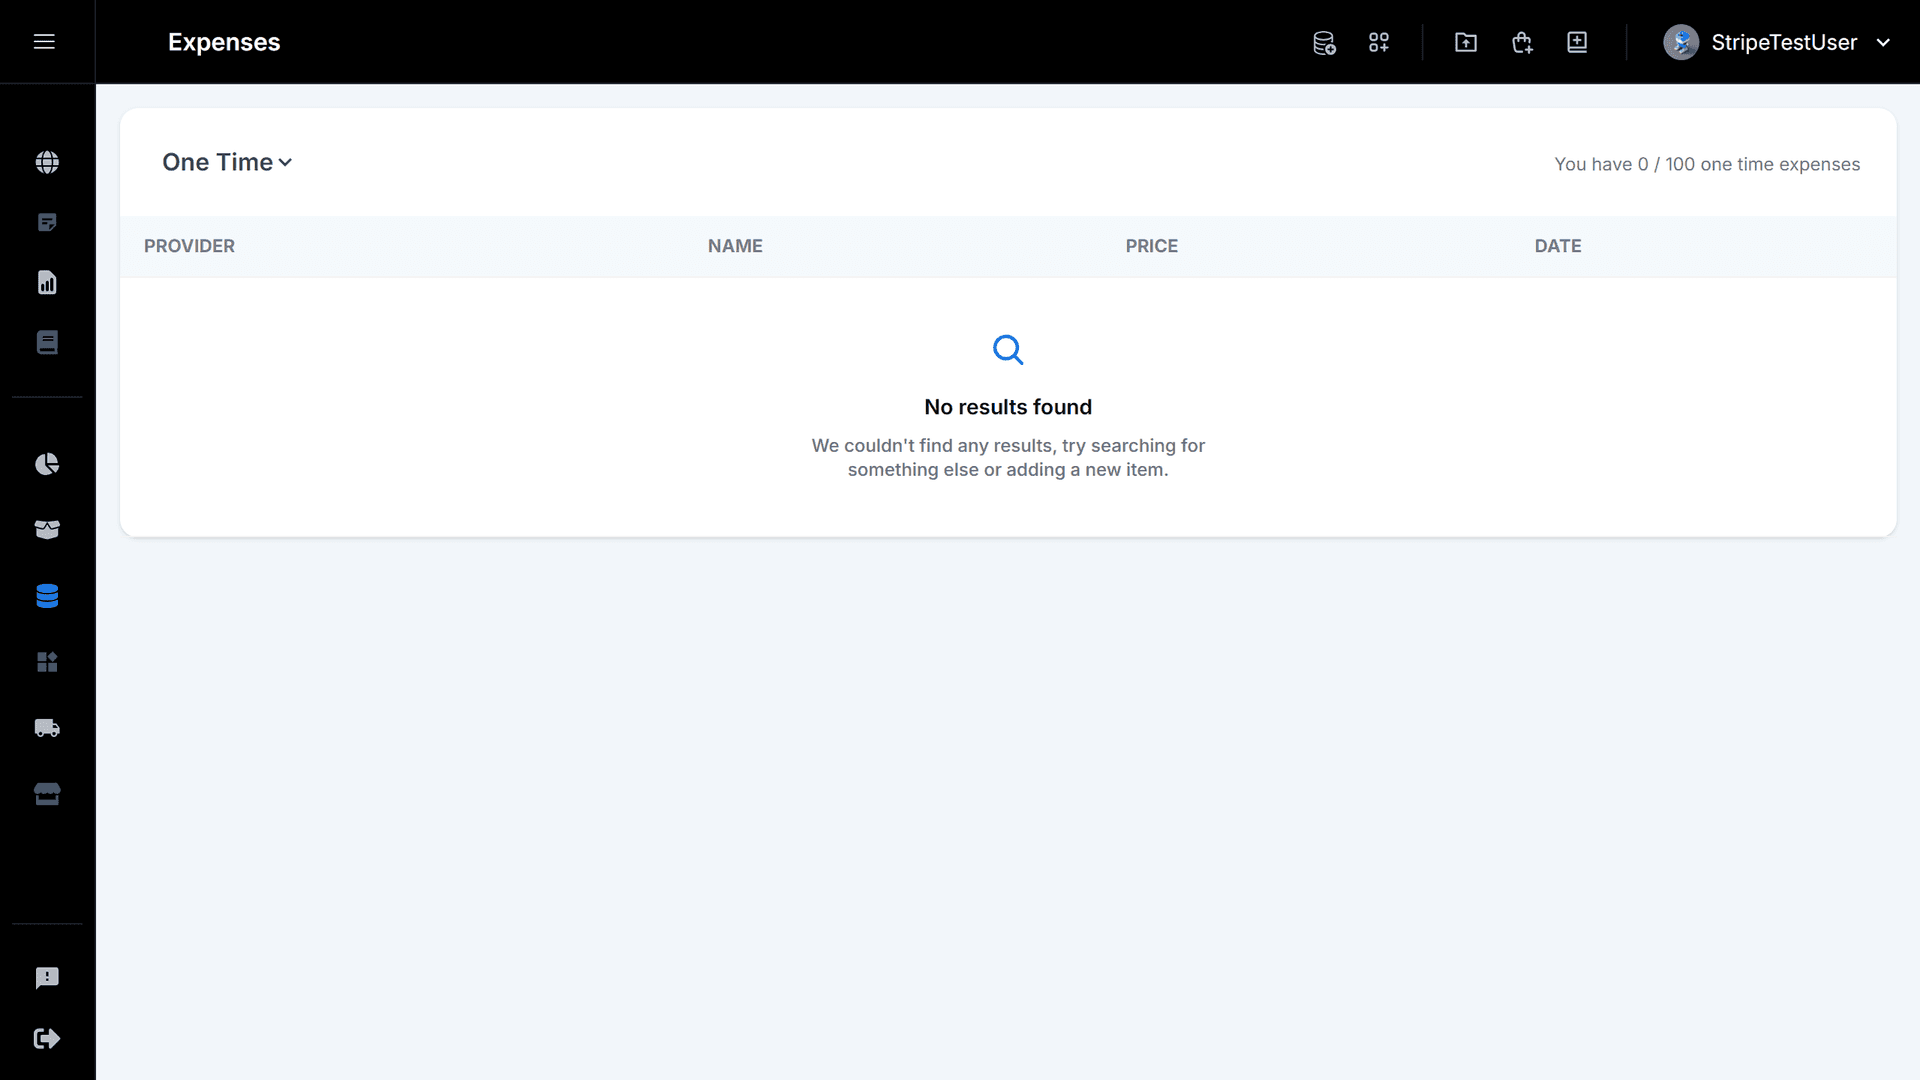
Step 1: Track All Business-Related Transactions

Expense log showing date, category, and amount columns

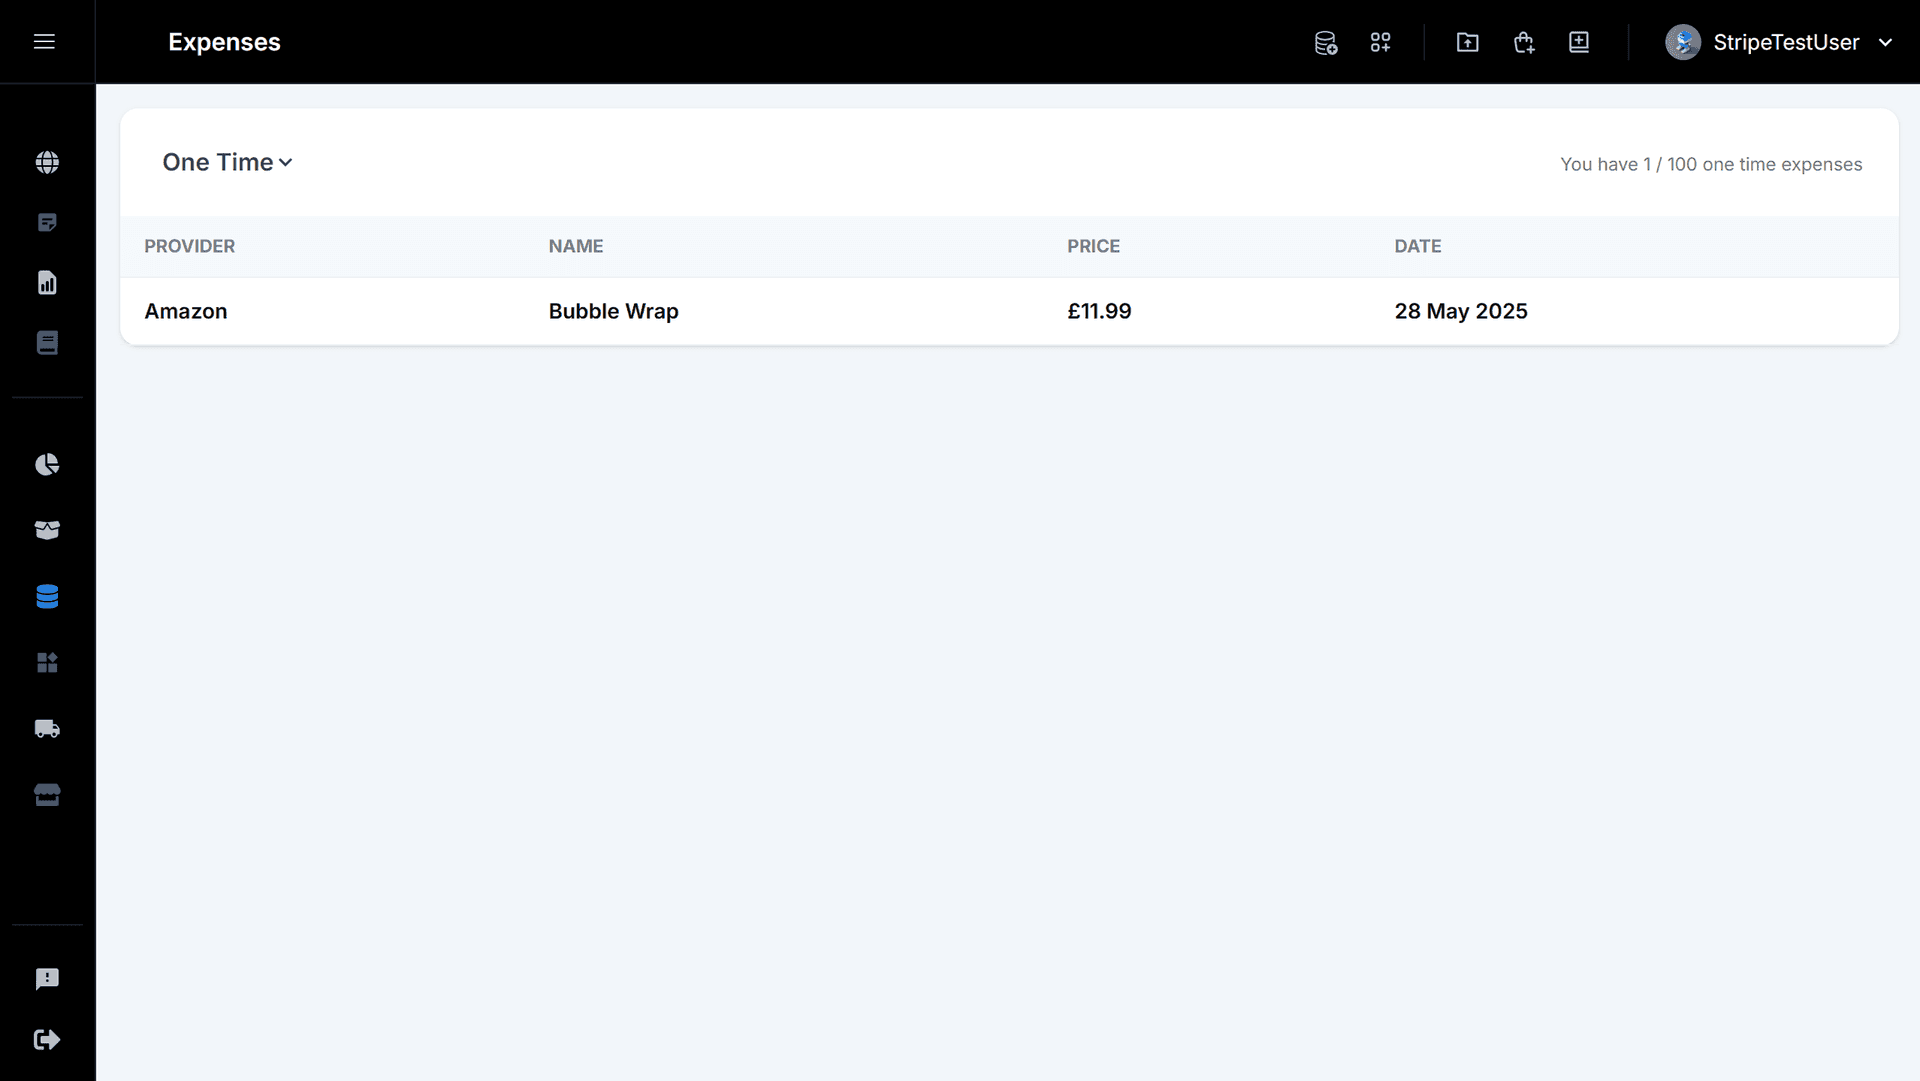
Step 2: Quickly Add a New Expense Entry

Expense modal with fields for amount, category, and notes

Step 3: Review and Manage Your Expense History

Expenses table with filtering
Finacial Hub

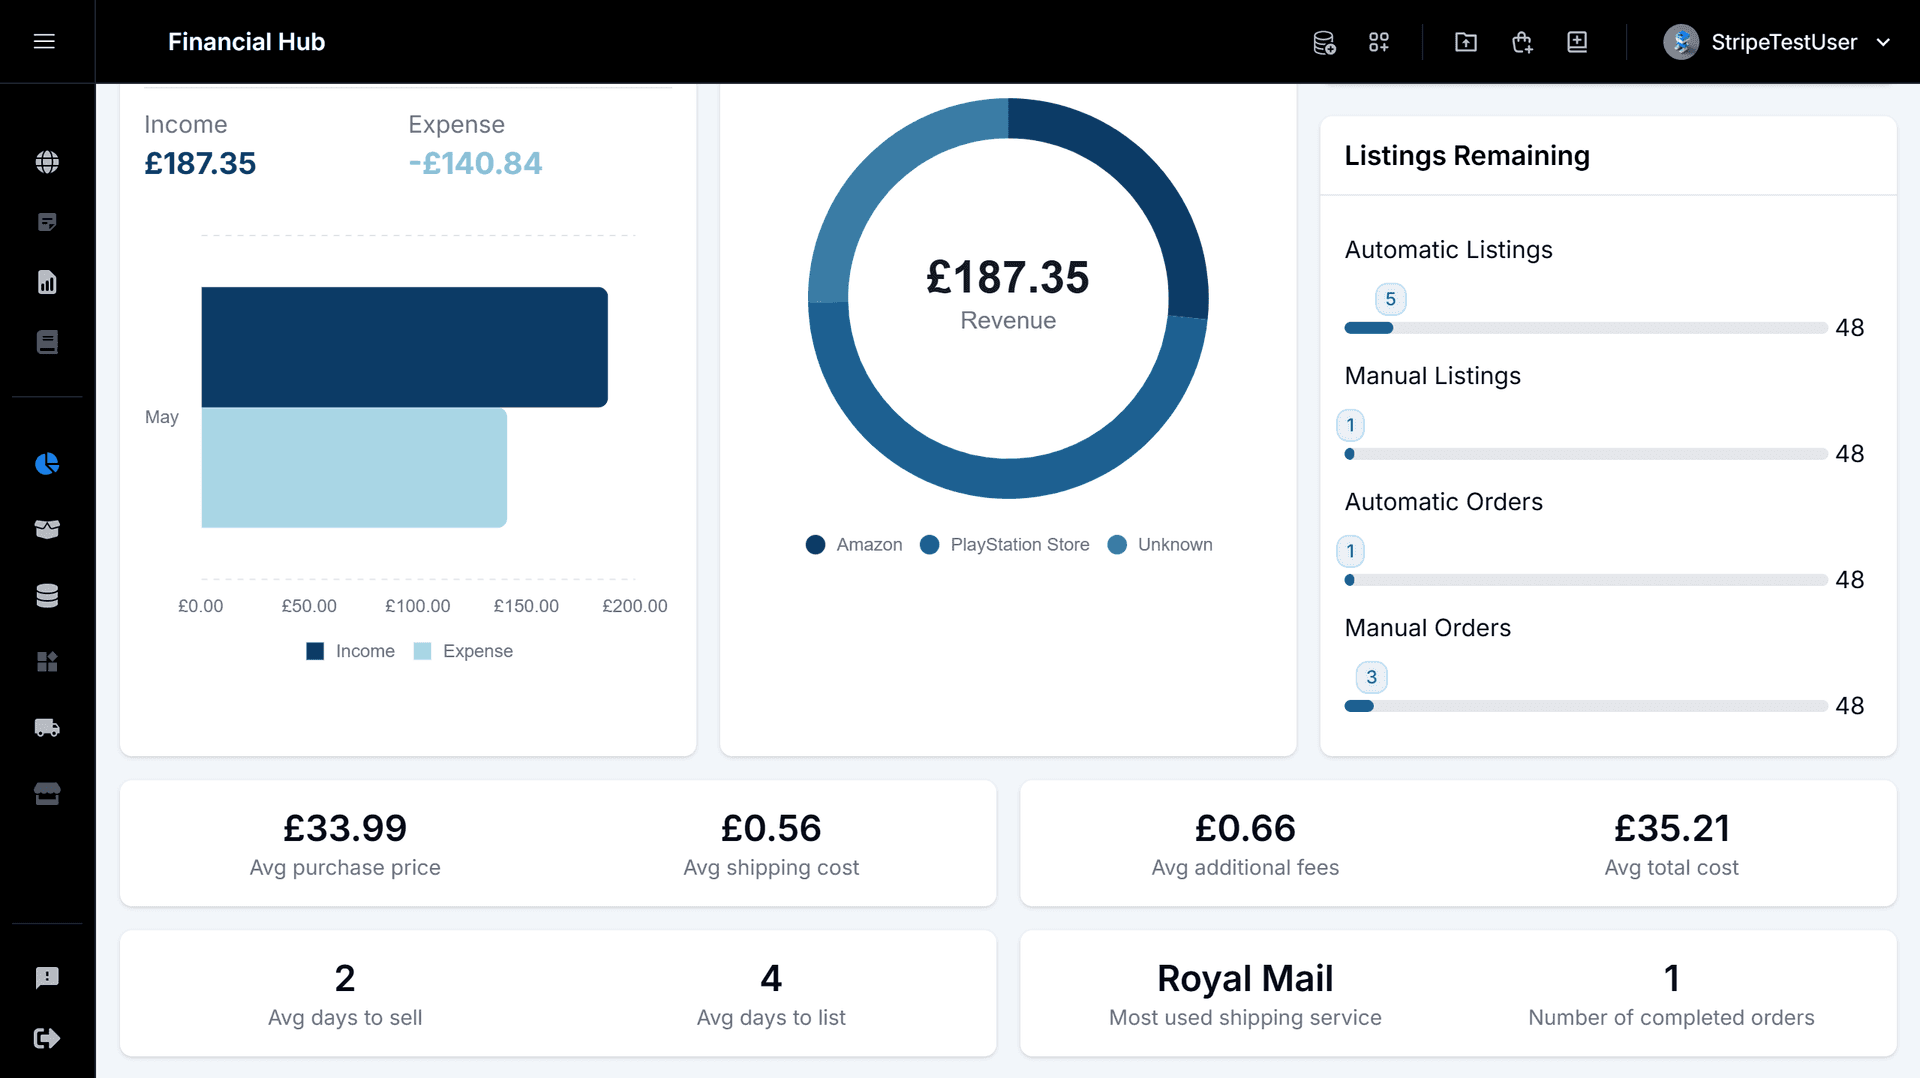
Step 1: View Your Store’s Financial Dashboard

Financial hub overview showing revenue, profit, and expense charts

Step 2: Analyze Shipping Performance & Cost Breakdown

Chart comparing shipping times and costs across different carriers

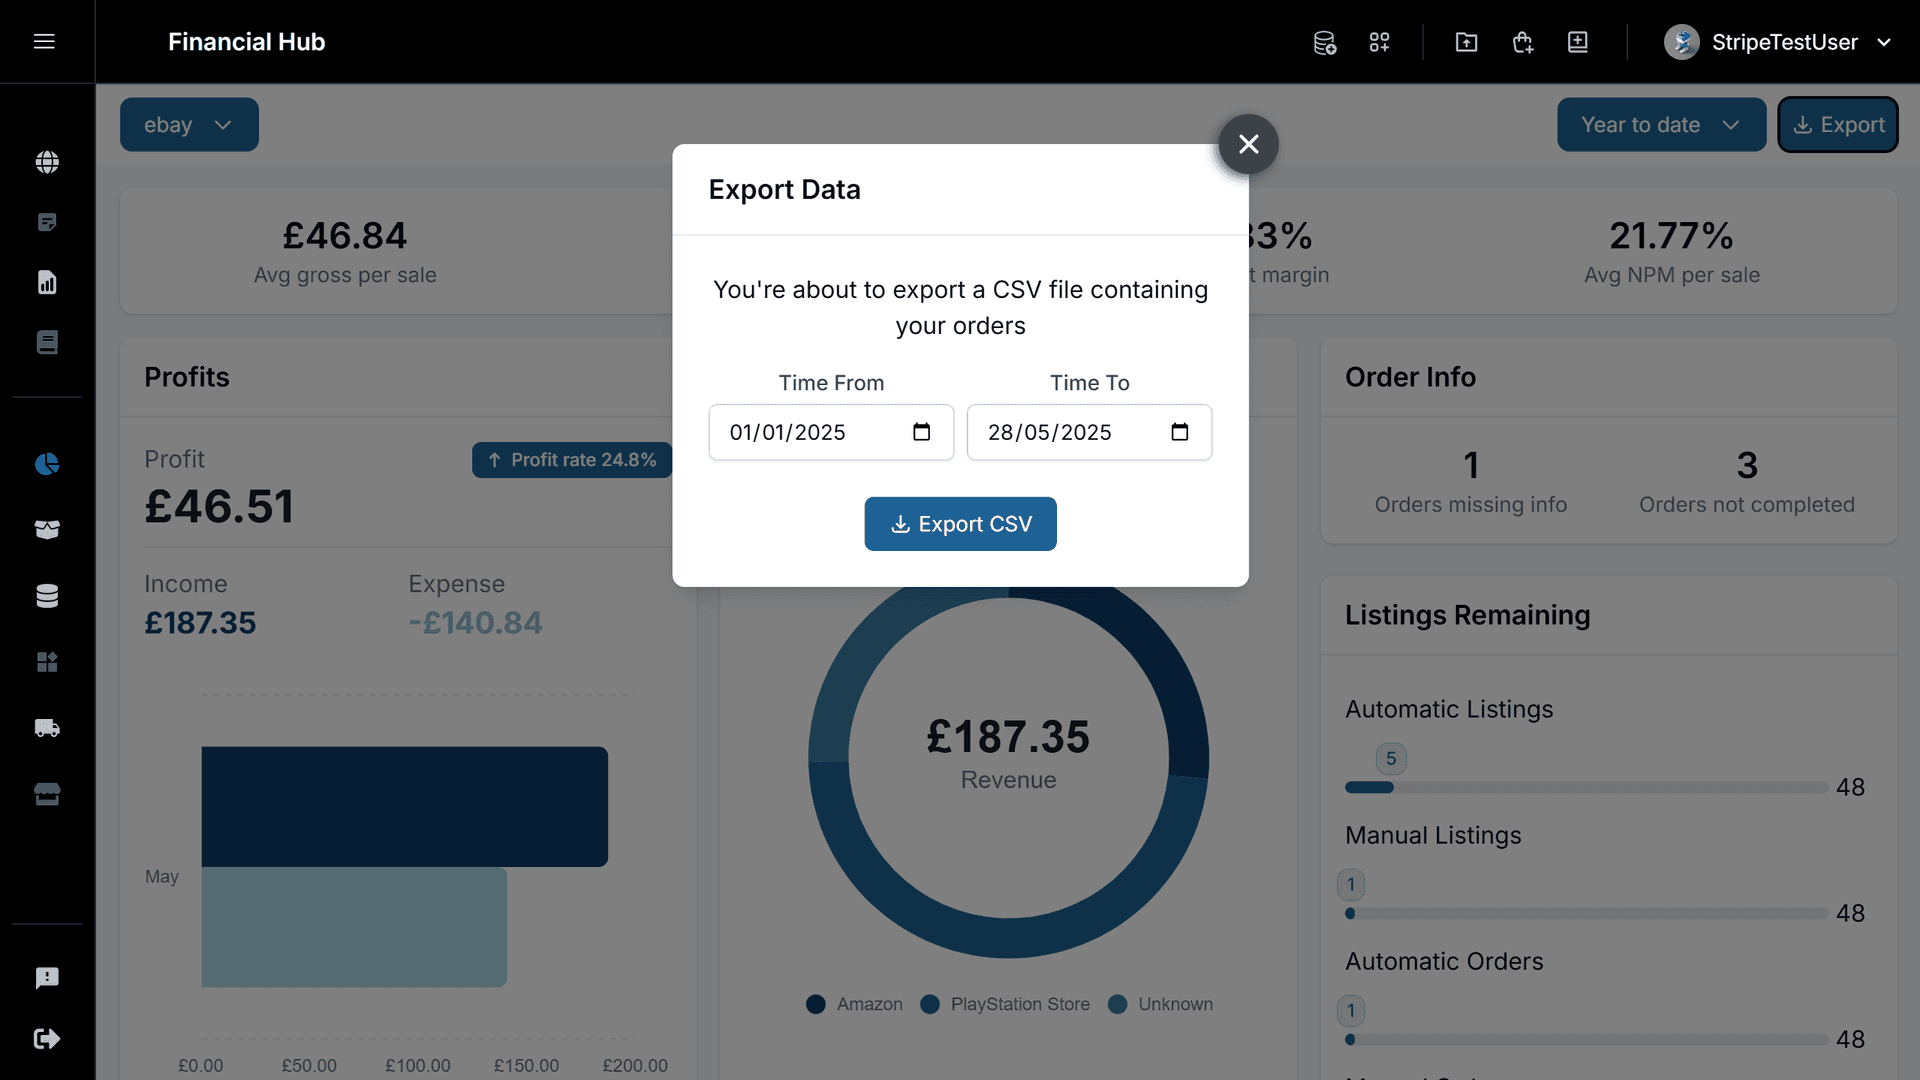
Step 3: Export Your Order Data for Offline Analysis

Export dialog with options to download order data as CSV
Tax Report

Step 1: Access Your Tax Reporting Dashboard

Tax reporting dashboard showing summary cards for income, inventory, COGS, and expenses